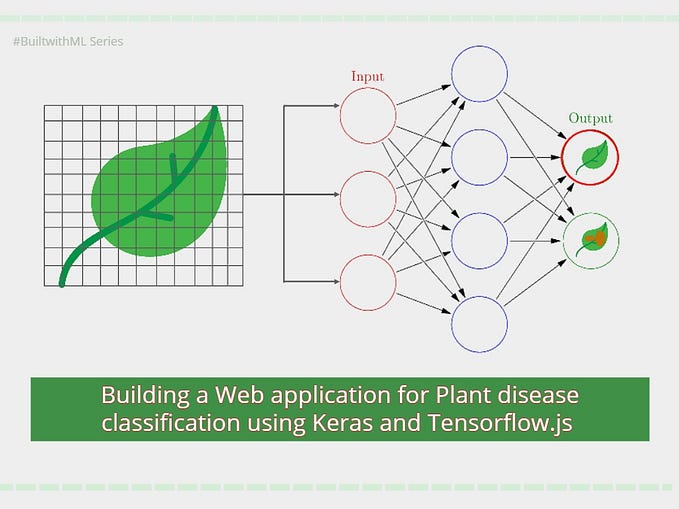
Building a Plant Disease Classification Web App using Keras and Tensorflow.js (PART 2)

Hi friend, this is PART 2 of the two-part tutorial series on building a web app with Keras and Tensorflow.js. I encourage you to read the first part HERE.
LINK TO FIRST PART:-
In the first part of this tutorial, I showed you how to build/train a MobileNet model in Keras to classify diseases from images of plants (crop leaves) downloaded from Kaggle (using the Kaggle API). We did this by employing the concept of transfer learning for multi-class classification. I genuinely hope you learned a lot from the first part.
Deploying machine learning models for public use is indeed essential to creating value with Machine learning. Therefore, in this final section, I will teach you how to deploy the Tensorflow model — which was trained using Python into a Tensorflow.js model — for usage and JavaScript and ultimately browser-based inference.
This will be achieved by converting the Python model to a Javascript-compatible format, using ‘ tensorflowjs-converter’ — An efficient Python module that converts saved Keras models to formats compatible with Javascript. Please refer to the Tensorflow.js Documentation here for an analysis of its advanced features, use cases, and tutorials.
This is a demo of the final application we will be building (Please ignore the UI :) ):-

Requirements / Pre-requisites:-
- Google Colab (We used this extensively in the first part, I presume you have this set-up already).
- The saved MobileNet model from the first part of the tutorial (mobilenet_model.h5)
- Basic knowledge of HTML, CSS, and JavaScript (This is not very necessary, however)
- An IDE for writing HTML, CSS, and Javascript codes (i.e VSCode, Sublime Text, etc.)
- And most importantly, the willingness to learn.
So, let’s get started.
Codes and Implementation
The codes and implementation will be explained in well-detailed steps to preserve structure and aid understanding.
STEP 1:- Converting the Keras Model to a Tensorflow.js compatible model
This is the initial and most important step. This is achieved using a Tensorflow.js converter module in Google Colab which converts our saved model (from HDF5 or .h5 format) to a .json format which is compatible with any Javascript environment. The Tensorflow.js converter also works with several other file formats such as the Tensorflow SavedModel format, Tensorflow Hub module etc.
To use this converter, we need to install it in our Google Colab environment, Kindly run this command in a new code cell on Colab:-
# This downloads/installs tensorflowjs into your Google colab environment !pip install tensorflowjs
Next up, create a new folder in your base directory (i.e PLANT DISEASE RECOGNITION folder) where the converted Tensorflow.js model will be stored:-

Next up, we can easily convert the Keras model to a Tensorflow.js model using the ‘tensorflowjs_converter’ command. The arguments for the ‘tensorflowjs_converter’ are the input_format (Keras), the directory containing the saved model (‘models/mobilenet_model.h5’), and the output directory for the converted model (‘tensorflowjs-model/’). Please note that this can also be done in any IDE or environment of your choice. Run this command in a new code cell:-
!tensorflowjs_converter --input_format keras models/mobilenet_model.h5 tensorflowjs-model/Voila !, Our model has been successfully converted, and the compressed output files are stored in the specified output directory (‘tensorflowjs-model/’). We can easily unzip this and download it directly to our Local machine (computer):-
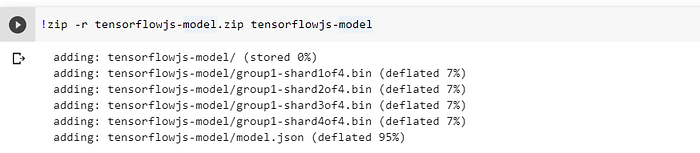
Great work so far, we have successfully downloaded our converted model. The ‘model.json’ file is the main file that will be used to load the model on a browser to make predictions. Please download the folder ‘tensorflowjs-model’ folder and ‘class_indices.json’ file from your Google Drive to your local machine.
STEP 2: Creating the Frontend for the Web application using HTML and CSS
This section involves creating the front end for the web application. I won’t really walk you through the steps involved in creating the front end explicitly, as that is not the core objective of this tutorial. However, only simple HTML elements and CSS styles will be used.
Folder Structure for the Project:-
Please ensure that the “tensorflowjs-model” folder containing the downloaded model.json file is stored in your working directory locally, and create an HTML file ‘index.html’, a CSS file ‘style.css’, and a JS file ‘script.js’ which will contain the Javascript codes:-
root /
PLANT DISEASE CLASSIFIER APP
    |-- tensorflowjs-model
    |-- index.html
    |-- style.css
    |-- script.js
    |-- class_indices.json
The major HTML element used is the <input/> element for uploading image files to the browser for prediction. The Basic Structure of the HTML webpage is shown below (It’s also well-commented for beginners):-
‘style.css’ — The external CSS Stylesheet containing the simple styling for the website (I encourage you to tweak this to your preferred taste):-
Great work so far, you can open the index.html file from your IDE/ Text editor in your browser to see the interface.
Next, we need to Load the Tensorflow.js library from cdn.js into our HTML file(A content delivery network) to run the model in the browser, and make predictions. Include this <script></script> tags just above the </body> tag to load Tensorflow.js, and the external Javascript file containing the JS codes.
<script src="https://cdnjs.cloudflare.com/ajax/libs/tensorflow/2.0.1/tf.min.js"></script><script src="script.js"></script>
STEP 3:- Writing the functionality in Javascript
This section entails implementing the entire Javascript functionality shown in the Demo at the beginning of the article. Summarily, we want to read the uploaded image from our browser, Convert the uploaded image to a Tensor format/Array, Load our Tensorflow.js model, perform required scaling operations and transformations on the uploaded image, and generate predictions.
The first step is to initialize/load the model which was saved in the ‘tensorflowjs-model’ folder. We will be using Javascript promises (async/await) to deal with asynchronous operations in a sequential/fancier manner/syntax:-
- tf.LoadLayersModel() method loads and Initializes the MobileNet model from the specified .json file directory ‘./tensorflowjs-model/model.json’.
Next up, we apply the initialized model to the transformed uploaded image in the browser to generate predictions.
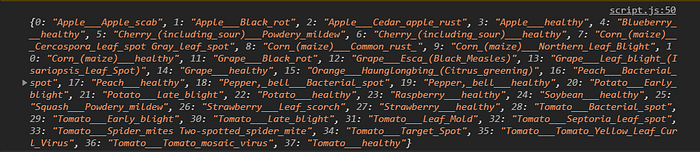
The ‘fetchData()’ async function simply fetches the JSON file containing the class_indices and parses it to a Javascript Object. The class_indices.json file contains the encoded class index and label names. This is the object shown in the Javascript console:-
- tf.browser.fromPixels() Loads the uploaded input image, and converts it to a tensor format,
- .resizeNearestNeighbor([224,224]) method resizes the image dimension to width = 224, and height = 224,
- .toFloat() method casts the tensor to type float32,
- .expandDims() method adds an outer batch dimension to the existing tensor i.e [1,224,224],
- .div() method simply rescales the image (i.e divides it by the scalar 255.0 as done during training).
The model.predict(img) function simply generates the predictions and returns a probability distribution for the 38 classes (Because a softmax activation function was used during training)

Then we need to compute the index of the maximum value in this array (using tf.argMax() method). The output is the class with the highest probability score because we used the ‘softmax’ activation function while compiling our model. This index can then be used to get the class name from the class_indices Object, which is then displayed in the browser. The percentage of accuracy is also displayed. Please, I encourage you to read through the following steps and relate them to the codes written above.
Also note that the Array.from(tensor.dataSync()) method is used to convert the tensor object, to a Javascript array object
STEP 4:- Hooking it all up
Finally, it is time to hook it all up and make predictions on our browser. I am really proud of you and grateful if you read thus far. We use Event Listeners in Javascript to invoke the initialize() and predict() async functions when an image is uploaded from the <input> element, This is the complete Javascript code.
Voila !, you have successfully deployed your Keras model on your browser using Tensorflow.js. I’d implore you to take your time to understand the entire process, and then improve the functionality.
This project can be deployed for public use on Github pages for free, Netlify, or any other hosting service. My version of the project can be accessed via this URL:- https://bit.ly/3k2MASg
Learning Objectives Achieved
Congratulations friend, for learning something new and useful. I really the two tutorials were informative enough and well-structured to aid understanding. We have completed the following learning objectives in PART 1 and PART 2 of the tutorial series:-
- Understanding how to download public datasets from Kaggle using Kaggle API,
- Understanding how to build a transfer learning model with MobileNet and Keras, and train the model on the downloaded dataset seamlessly,
- Understanding how to Convert Python Keras models to Javascript-compatible versions (using Tensorflow.js converter),
- Understanding how to deploy the model as a web application for inference on any browser.
There are a lot of ways to harness the knowledge gained from these tutorials to build other useful solutions. You can also improve the UI/UX of the app, add other features for real-time classification from a Web app, or any other innovative addition. This is only a basic use case, and I really encourage you to improve the functionality and optimize the solution.
Link to GitHub Repository:-
Please connect with me on LinkedIn if you have any questions or contributions.
Kindly leave claps to acknowledge my effort. I’d genuinely appreciate that, Thanks for reading Friend!
Stay safe folks, and keep harnessing useful knowledge. Thanks for reading !